Nov 23, 2019

Django GraphQL React Integration Tutorial: Part-1
In Pixly, we are using Django framework as our backend due to the excellent data science libraries and great community of the Python ecosystem. However, when we have decided to make frontend app as a single-page-application with React, we faced many difficulties. We hope that our tutorial will help newcomers a bit for solving their future problems.
What are the requirements to follow?
People who follow this tutorial should have at least an elementary level of knowledge about Python and basic level of knowledge Django framework. Also basic level of Javascript and React is a must.
This tutorial series are planned to be three detailed parts.
- Django backend
- GraphQL API
- React frontend and bundling the client app with Webpack
The Project Description
We will make a stupidly simple single page application written by React that will communicate Django backend via GraphQL API. React app will be written from scratch with webpack. Create-react-app boilerplate will not be used.
There are a few options to make django and react integrated in production, as I know.
- You may run two servers, one is django backend and one for Node backend server which is not an ideal one because of running two different server costs.
- You may use serverless architecture which is quite a new technology that you may pay only for the functions that is triggered by client side and query your database with it.
- You can run a Django backend server that will responses our frontend application’s requests. This will be our approach on this series.
Our frontend application will run on the browser of the users. All the frontend requests, logic and other stuff will be done by the browser with a React Javascript application.
Our project will not be an isomorphic application. Therefore we need an API that will be used for the communication of Python backend and Javascript frontend. We have two options for that; REST and relatively new technology GraphQL. We will use the GraphQL. Our frontend and backend will use Apollo GraphQL and Graphene frameworks respectively.
Maybe it is not the best solution but we will use two server in development. In production, we will use only one. Our bundled frontend app will not need a server.
Step-0: Configuring Environment
(Note: If you choose to use your existing python environment, you can skip this part and go to step-1)
This tutorial was written on a computer with Ubuntu 18.04 operating system. The default python interpreter is Python 3.6.x. Due to the need for clean environment, Python 3.8 will be installed, and virtual environment will be built on it.

Create Django Project
Step-1: Install dependencies
Step-2: Create django project
Step-3: Create new django app
Now we can create our app in order to create database models.
Step-4: Configure django settings
Update your setting file according to this.
Now the general structure of the directory should look like this.

Step-5: Run django server
Before starting our project, we should first make database migration. After, can start our project and see what happens.

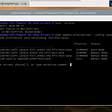
Now, Our django development server is ready.
You can go to the url address of http://127.0.0.1:8000/ and verify that it is working.

After then, you can stop the server by pressing CTRL+C
Step-6: Create movie app
We will create a movie model with basic fields that a movie should have.
Before that we should give some information about the field choices.
Why there is url field for poster rather than image field ?
Because serving static files in production is out of our scope, we decide to use only url field. Fetching the image from remote and then saving it to our production storage is a topic of another post.
Due to this, we will save only the poster’s url, not poster’s itself as an image file. Also sending static files like images is not a good approach. We will send the exact url of an image to the user. Then, user’s browser fetch the image from this.
What is slug and why it should be unique?
Let me explain; When you browsing on Pixly, if you open the The Matrix movie page, you will see that your address bar will be : https://pixly.app/movie/the-matrix-1999.
The last part of the url is the slug of The Matrix movie and also it is an identifier which makes the url distinctive from other movie pages. In the GraphQL part of the tutorial you will see that this slug will be used as a query parameter meaning that database queries will be done according to slug. Therefore it should be unique.
We can also choose the movie id as url identifier, but it’s clear that the url will not be human-readable address. Moreover, search engine indexing and ranking is a vital part of any website that targeting new users. Readable url address’ are good for users themselves and also suggested by search engine guides. For example; Google webmaster guideline recommends to use clean and concise url structures.
Let’s make our model. Open items/models.py file.
Migrate again in order to make database arrangements for our new model.
Step-7: Populating Database with Initial Data
There is no movie record currently in our database. We will provide a small initial data to create some movie records. All the data is provided by community built The Movie Database (TMDb).
First, create a class method in order to import initial data.
Then, get initial data file from github repo and set the initial_data.py file in utils folder. The directories and the initial data looks like this.

Normally we should have open django shell. However shell_plus which is provided by django_extensions package is more functional so we will use this.
Our model and database are ready. You can close the shell with quit command.
In the next part we will create our API with python graphql framework Graphene and its django package graphene-django.
Originally published at https://pixly.app.